Physical Computing - LEDs and Push Buttons 2

Adam Boucek
|September 28th 2023
Physical Computing - LEDs and Push Buttons 2
In this lab, we will continue with another set of projects you can create with ESP32-WROVER. If you missed the first section go check it out. Instructions are given by Andrew J. Park, Ph.D..
We will use Freenove Ultimate Starter Kit for ESP32-WROVER which you can buy on Amazon. How to set up the kit and start uploading code you can find on Freenove.
If these projects seem too challenging you can do the Freenove tutorials. See them in the tutorials section ↓.
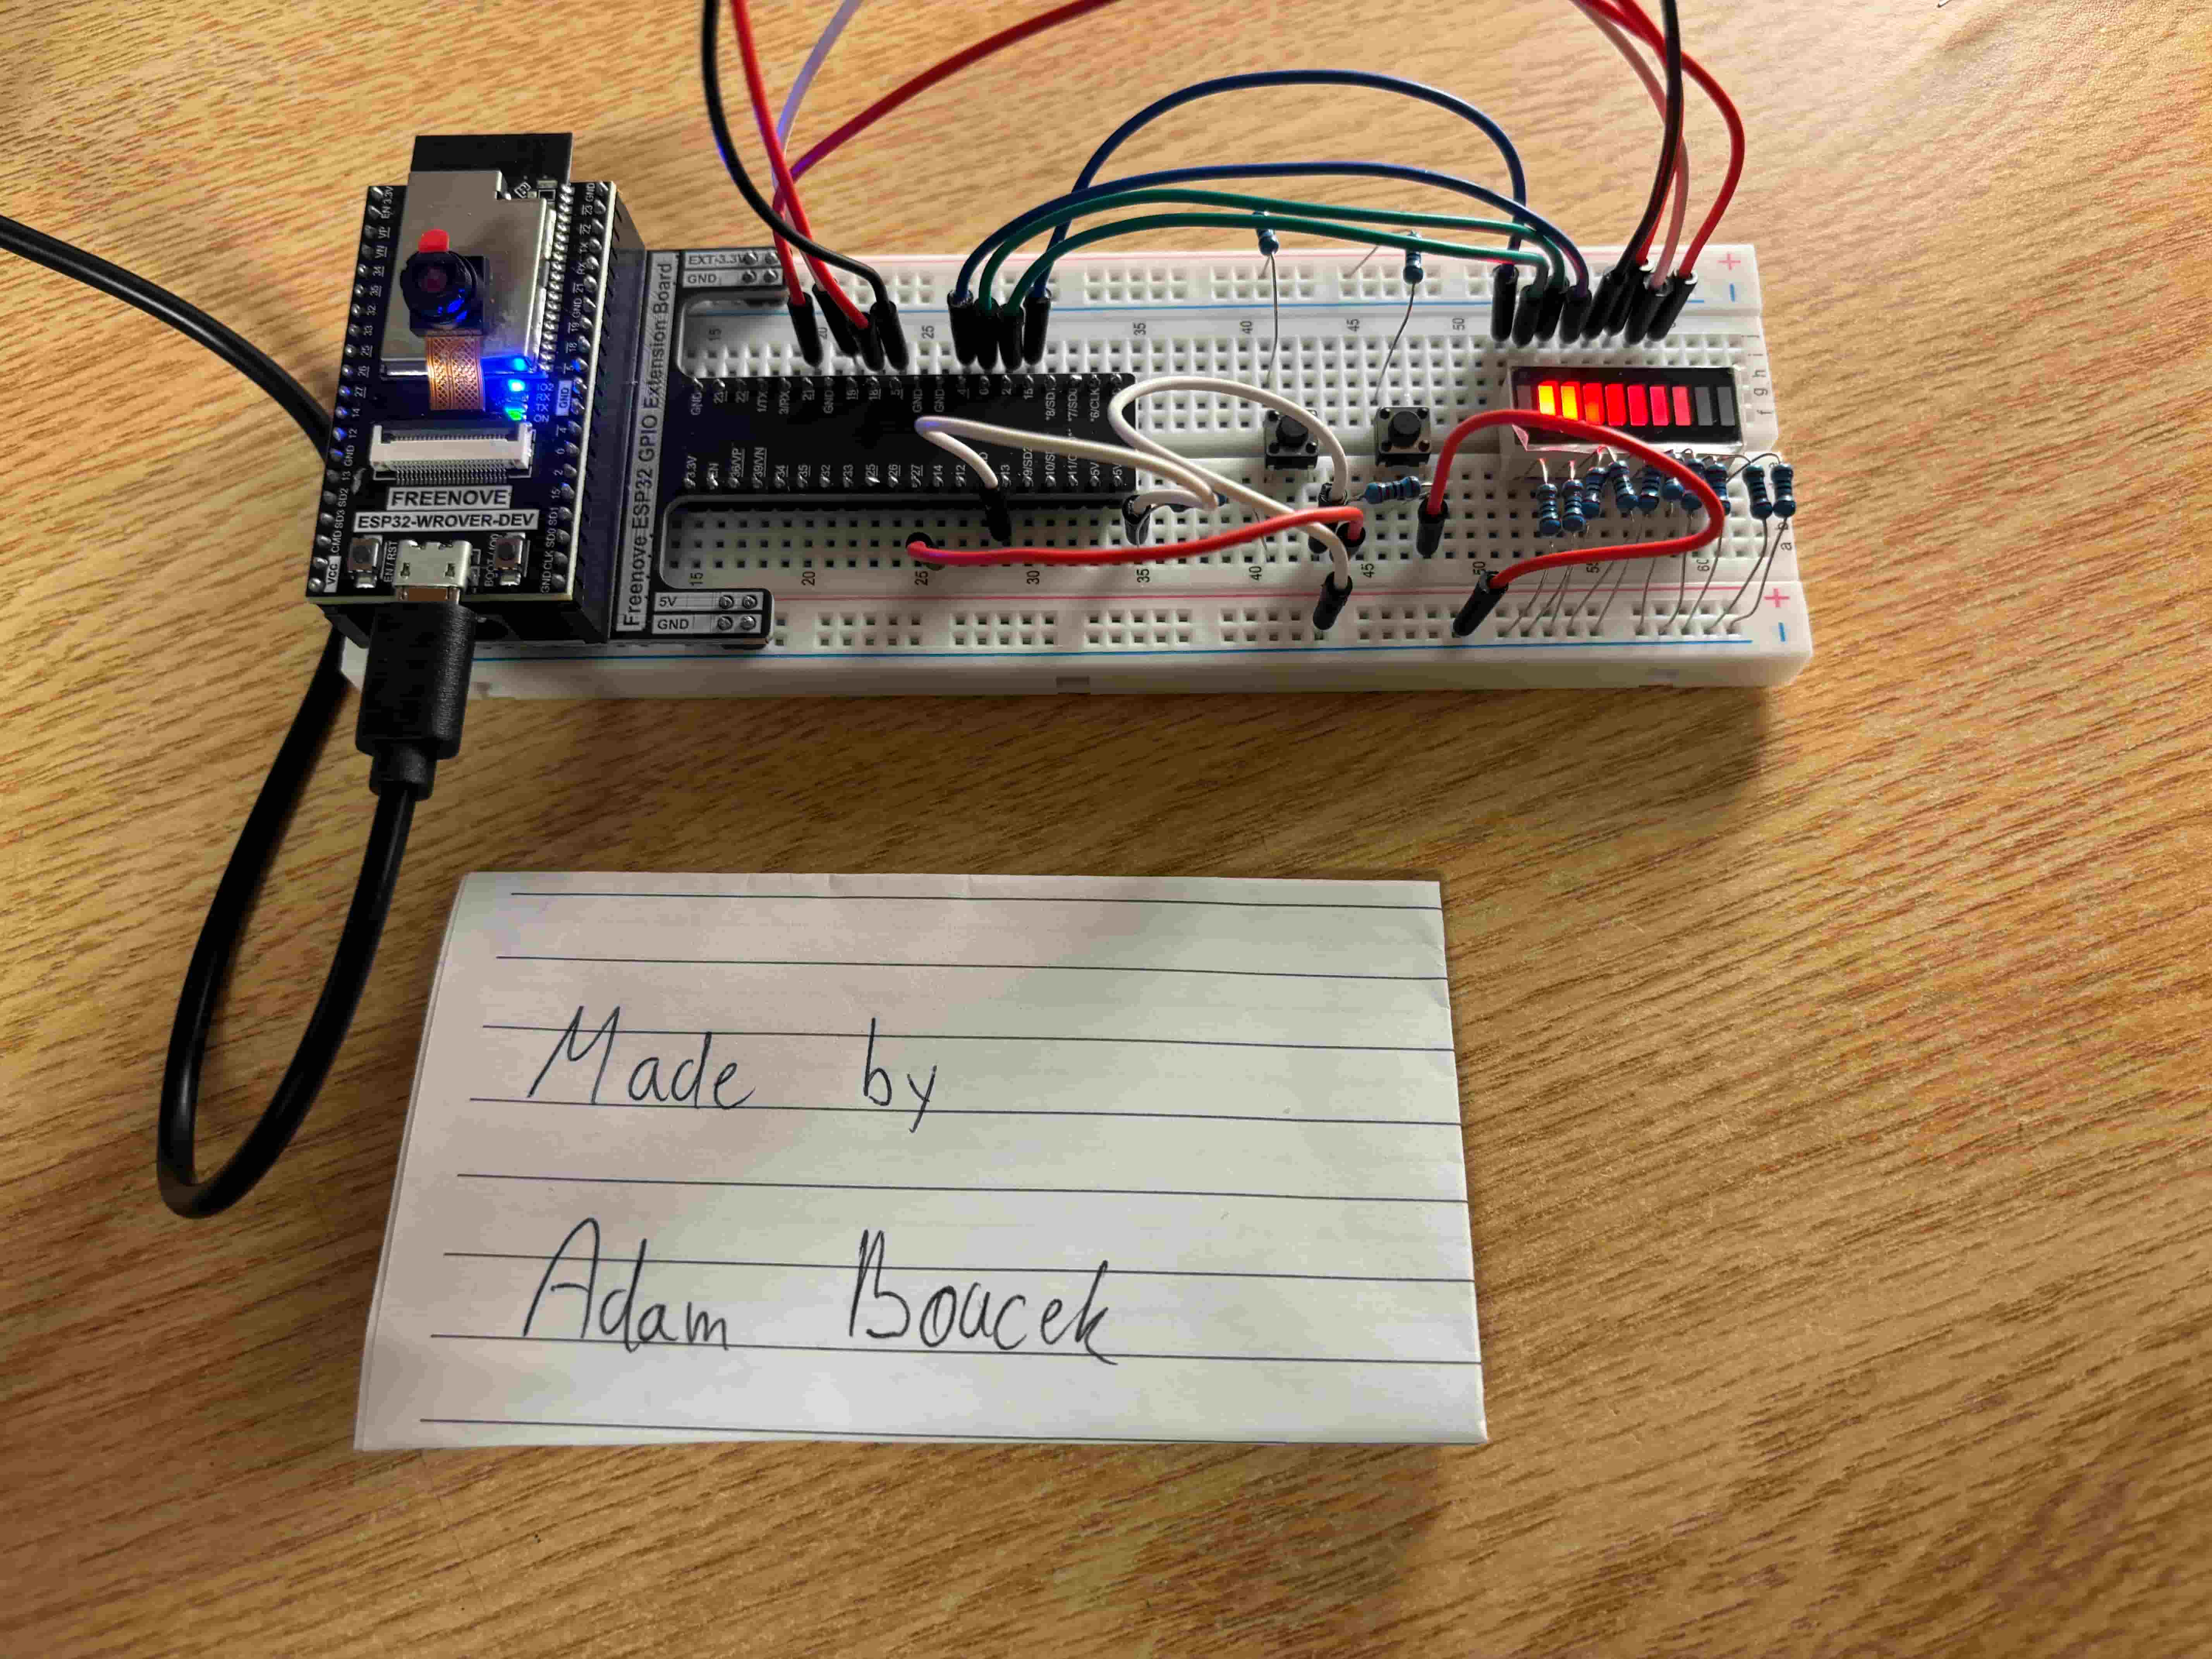
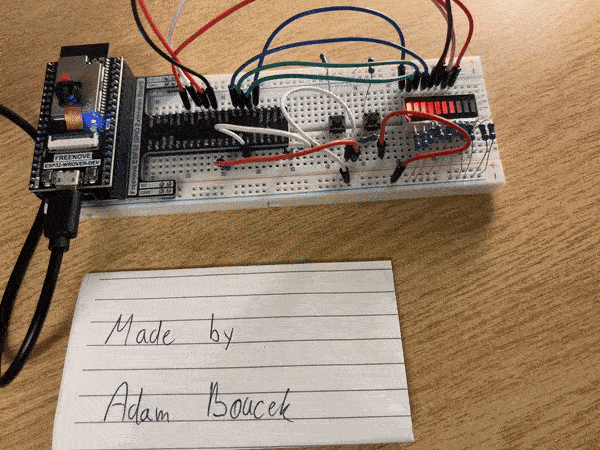
Project 1 - LED Bar
Date: 09/27/23
Instructions:
Design and construct a circuit that includes an LED bar graph and two push buttons (of course, you also need resistors). When one push button is pressed, the LED light is gradually lighting up and out from left to right (1 -> 2 -> 3 -> 4 -> 5 -> 6 -> 7 -> 8 -> 9 -> 10 -> 1 -> 2 ……) whereas when the other button is pressed, the LED light is gradually lighting up and out from right to left (you need to use PWM).
Parts:
- ESP32-WROVER x1
- GPIO Extension Board x1 (optional)
- Breadboard x1
- Jumper M/M x12
- Push Buttons 2x
- LED Bar 1x
- Resistor 220Ω x12
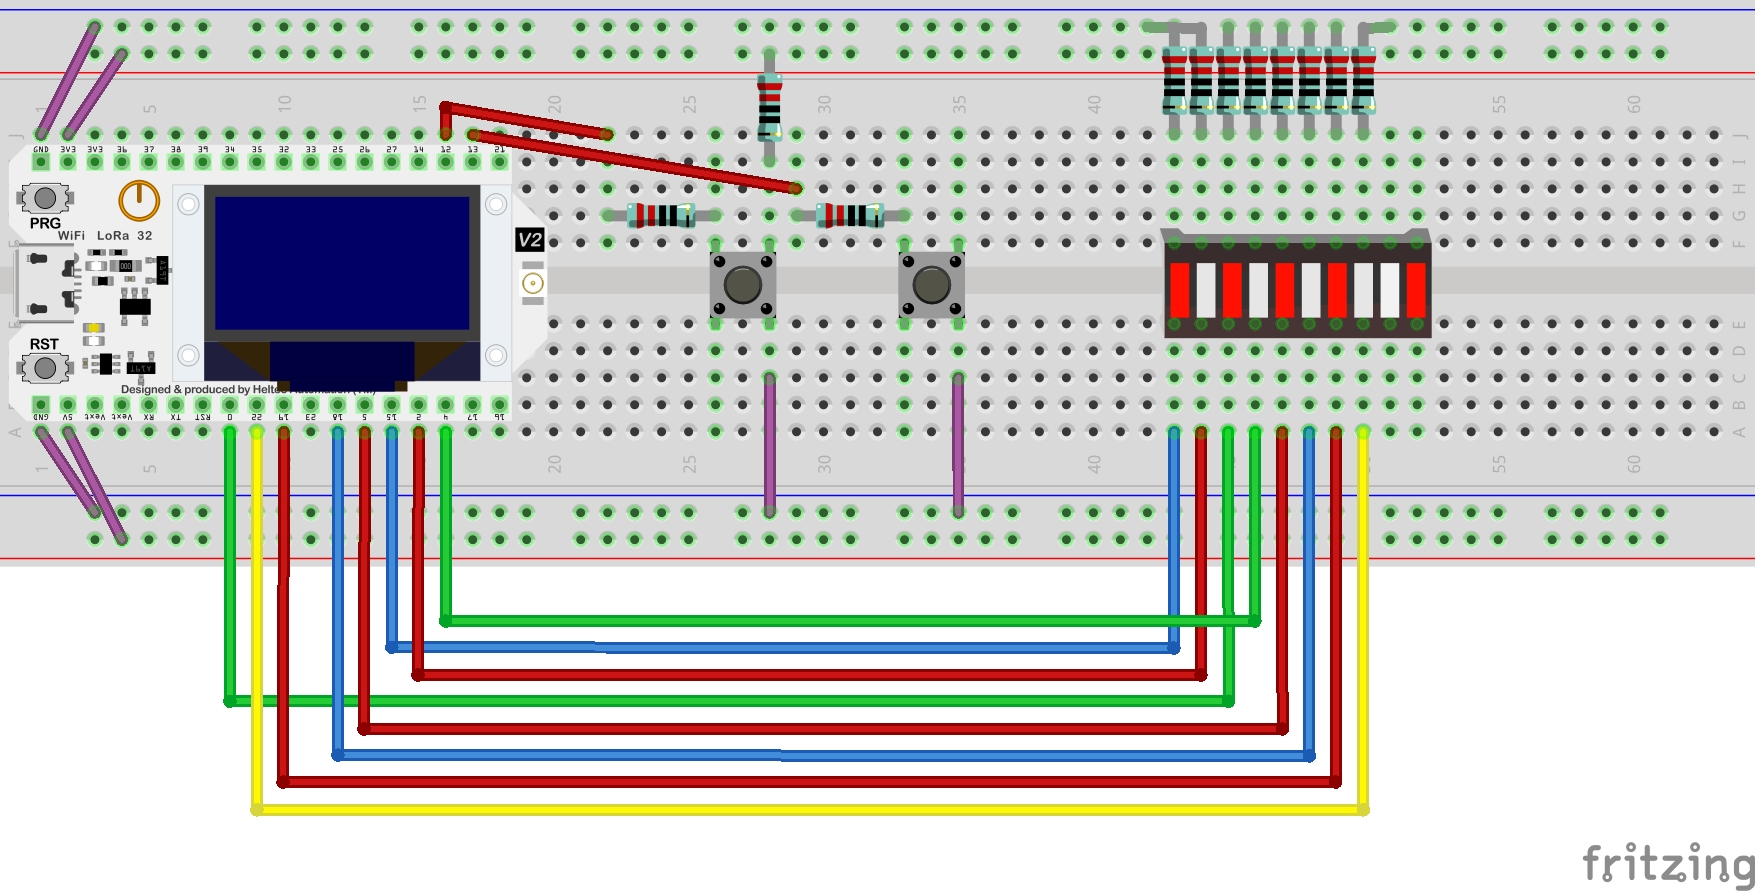
LED Bar schema:
LED Bar Breadboard View:
Source Code:
project-1.py
from machine import Pin,PWM
from pwm import myPWM
import time

mypwm = myPWM(15,2,0,4,5,18,19,21)
chns=[0,1,2,3,4,5,6,7]
dutys=[0,0,0,0,0,0,0,0,1023,512,256,128,64,32,16,8,0,0,0,0,0,0,0,0]
delayTimes=50

# buttons changing direction of floating light
buttonRightToLeft = Pin(13, Pin.IN,Pin.PULL_UP)
buttonLeftToRight = Pin(14, Pin.IN,Pin.PULL_UP)

def lightUp(order):
        if(order ==1):
            while True:
                for i in range(0,16):
                    if not buttonLeftToRight.value():
                        # direction change
                        lightUp(0)
                    for j in range(0,8):
                        mypwm.ledcWrite(chns[j],dutys[i+j])
                        # lights up the LEDs
                    time.sleep_ms(delayTimes)
        if(order ==0):
            while True:
                for i in range(0,16):
                    if not buttonRightToLeft.value():
                        # direction change
                        lightUp(1)
                    for j in reversed(range(0,8)):
                        mypwm.ledcWrite(chns[7-j],dutys[i+j])
                        # lights up the LEDs
                    time.sleep_ms(delayTimes)
try:
    # give it the first go by pressing one of these buttons
    while True:
        if not buttonLeftToRight.value():
            time.sleep_ms(20)
            lightUp(0)
        if not buttonRightToLeft.value():
            time.sleep_ms(20)
            lightUp(1)
except:
    mypwm.deinit()
To better handling PWM in LED bar we use this class from the Freenove tutorial:
pwm.py
from machine import Pin,PWM

class myPWM():
    def __init__(self, pwm0: int=15, pwm1: int=2, pwm2: int=0, pwm3: int=4, pwm4: int=5, pwm5: int=18, pwm6: int=19, pwm7: int=21):
        self._pwm0=PWM(Pin(pwm0),10000)
        self._pwm1=PWM(Pin(pwm1),10000)
        self._pwm2=PWM(Pin(pwm2),10000)
        self._pwm3=PWM(Pin(pwm3),10000)
        self._pwm4=PWM(Pin(pwm4),10000)
        self._pwm5=PWM(Pin(pwm5),10000)
        self._pwm6=PWM(Pin(pwm6),10000)
        self._pwm7=PWM(Pin(pwm7),10000)

    def ledcWrite(self,chn,value):
        if chn==0:
            self._pwm0.duty(value)
        elif chn==1:
            self._pwm1.duty(value)
        elif chn==2:
            self._pwm2.duty(value)
        elif chn==3:
            self._pwm3.duty(value)
        elif chn==4:
            self._pwm4.duty(value)
        elif chn==5:
            self._pwm5.duty(value)
        elif chn==6:
            self._pwm6.duty(value)
        elif chn==7:
            self._pwm7.duty(value)

    def deinit(self):
        self._pwm0.deinit()
        self._pwm1.deinit()
        self._pwm2.deinit()
        self._pwm3.deinit()
        self._pwm4.deinit()
        self._pwm5.deinit()
        self._pwm6.deinit()
        self._pwm7.deinit()
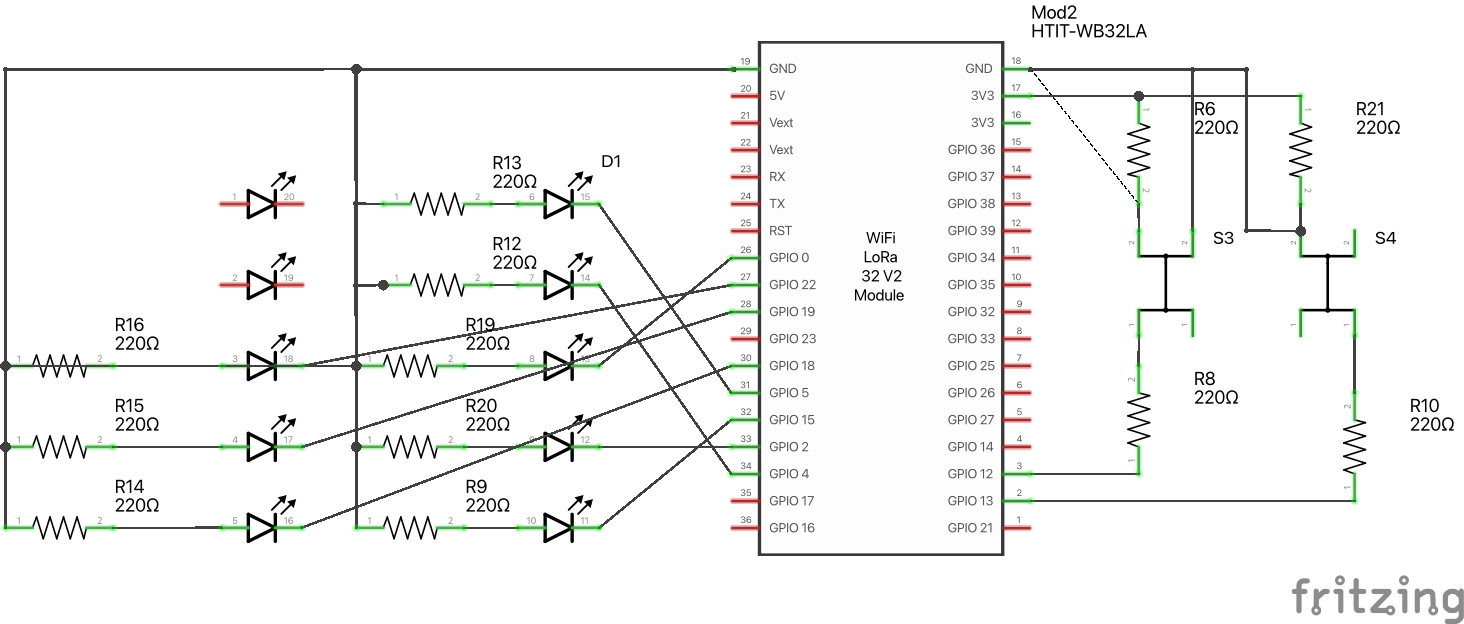
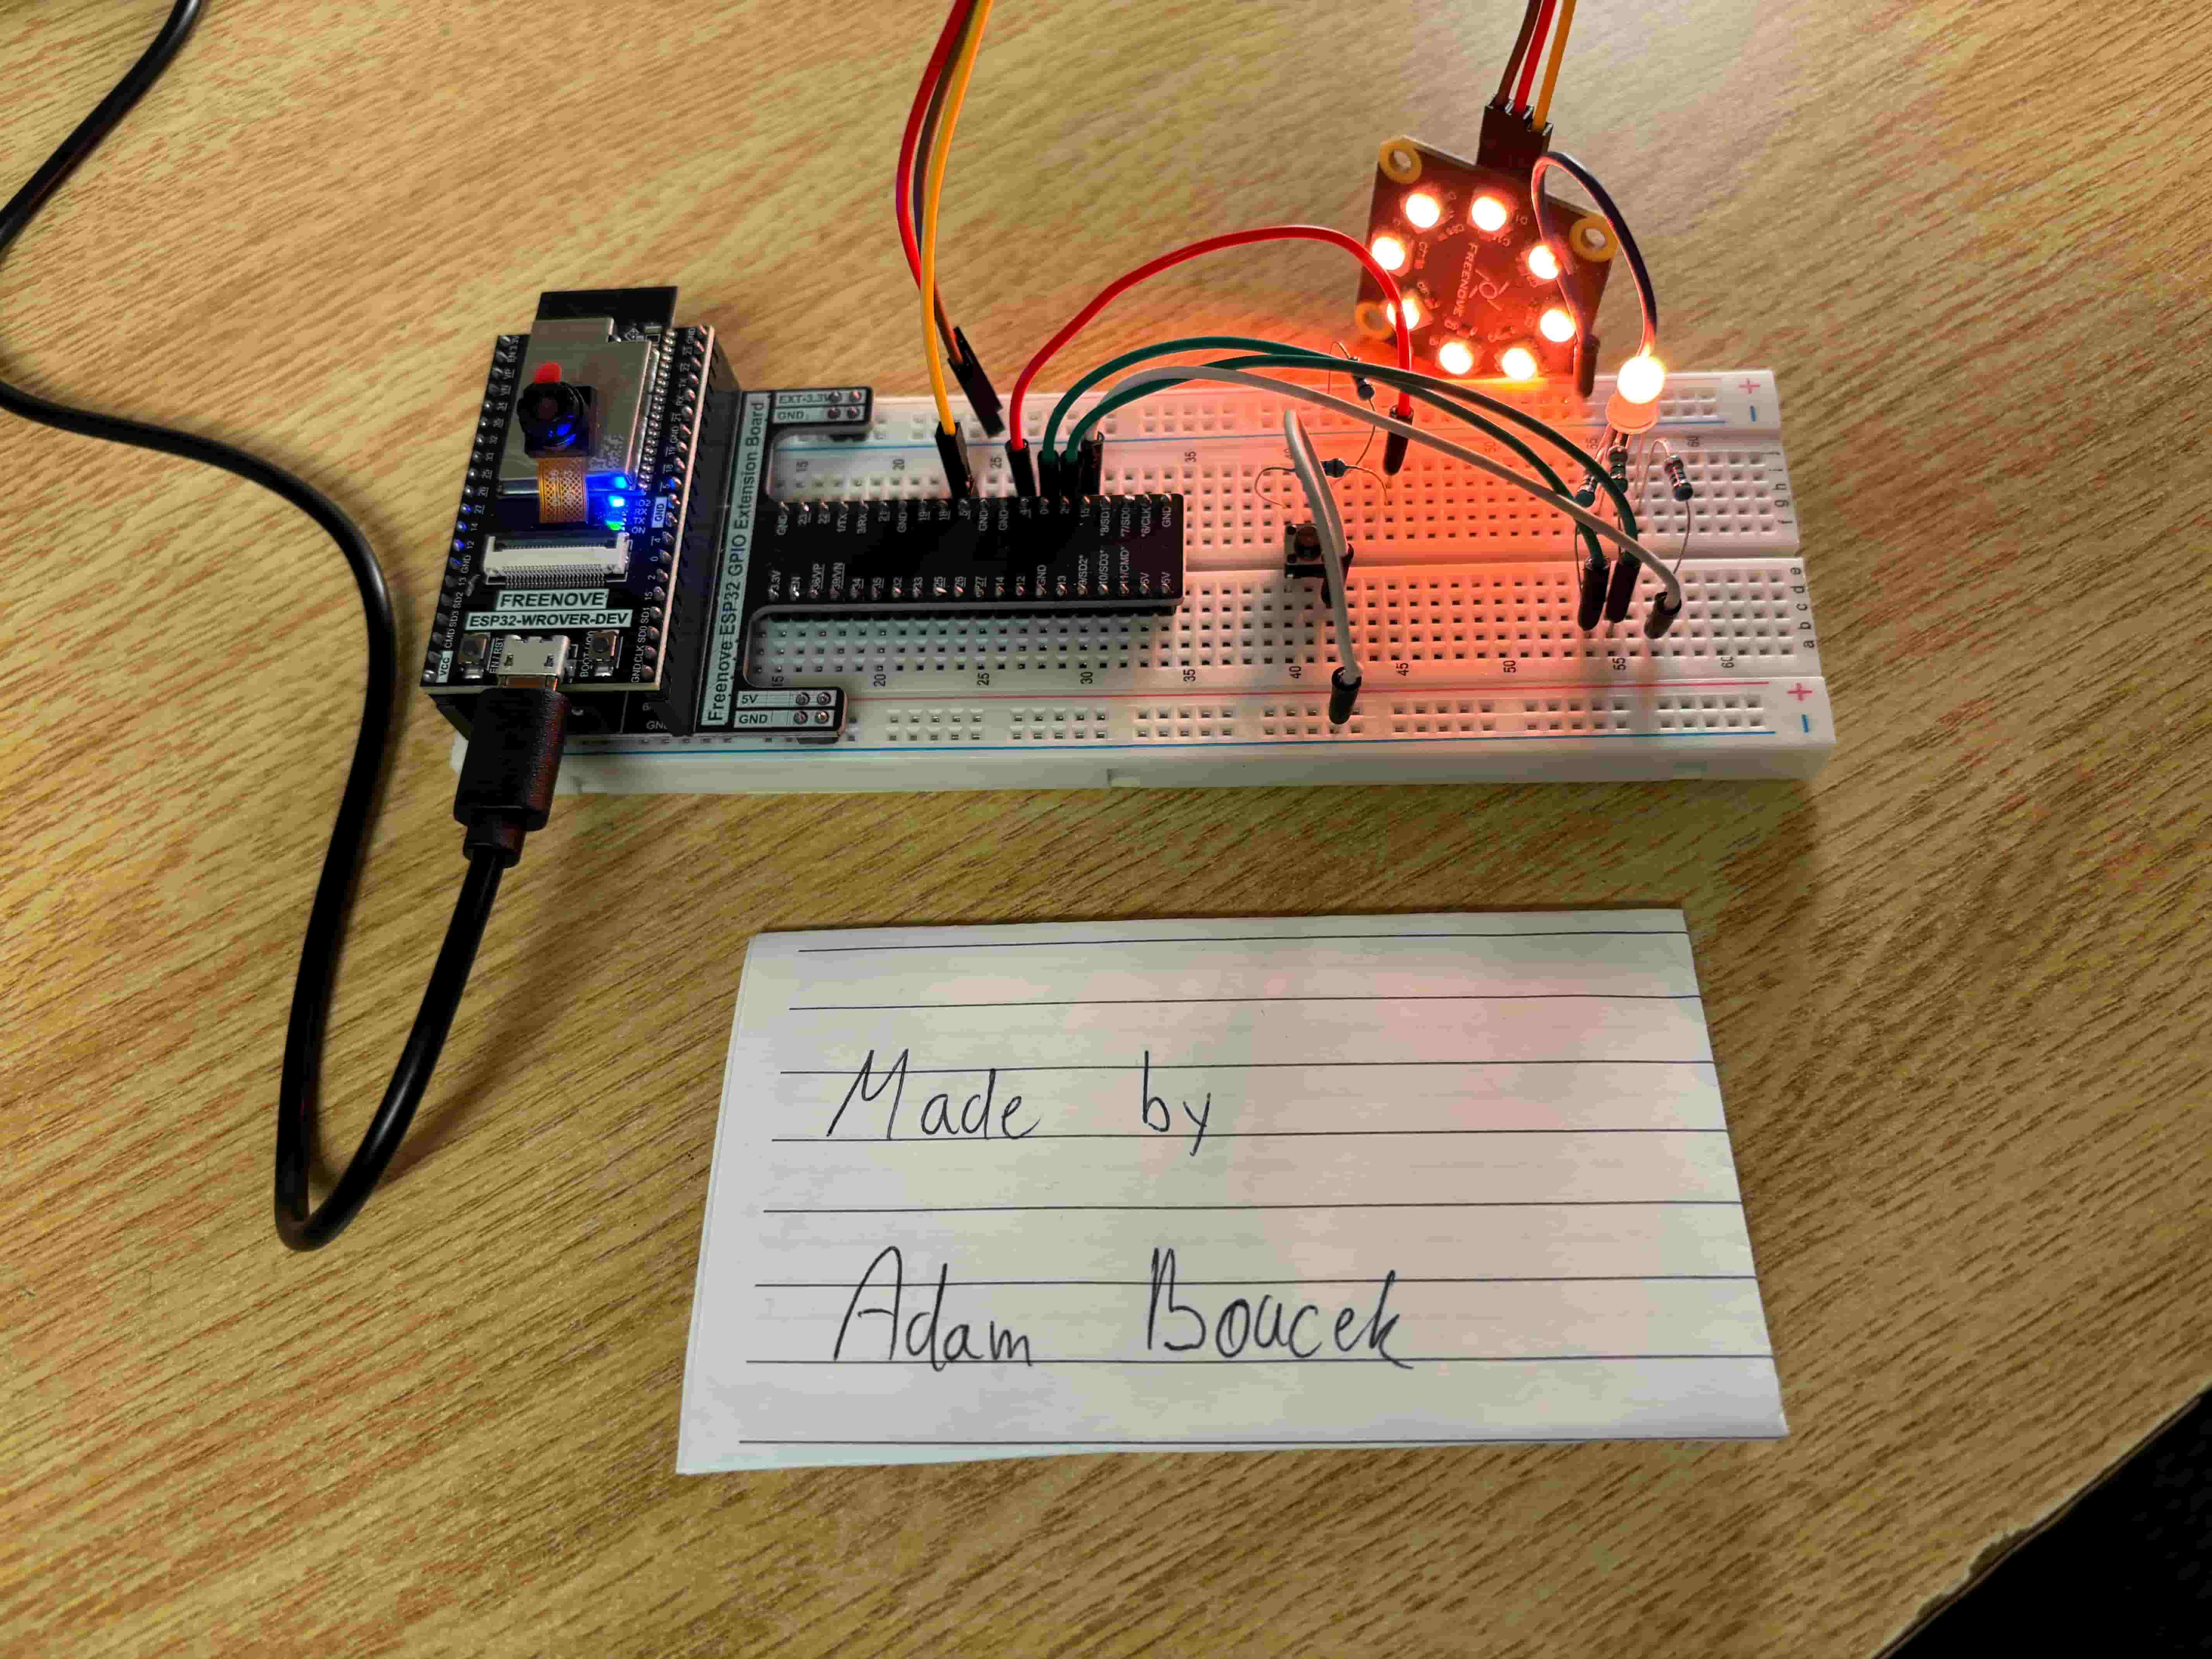
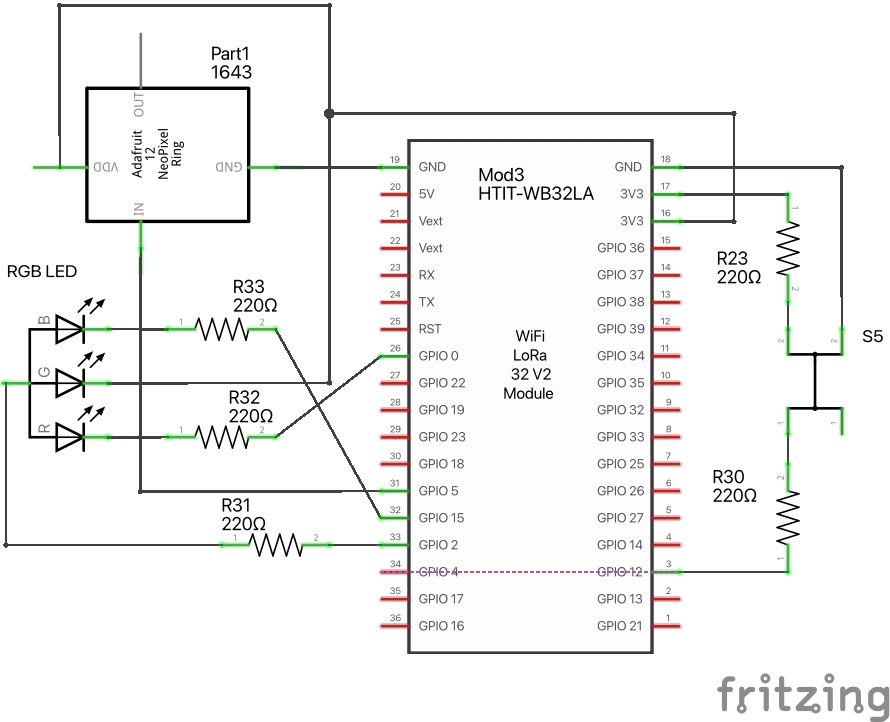
Project 2 - RGB LED and NeoPixels
Date: 09/27/23
Instructions:
Design and construct a circuit that includes a push button, an RGB LED, and NeoPixels (8 RGB LED module) (and registers). When the button is pressed, the RGB LED is lit with a specific colour followed by the NeoPixels are lit with the same colour. Each pressing the button changes the colour from red to orange to yellow to green to blue to indigo to violet to red to orange to … (repeating the rainbow colours). Capture your settings and working circuit in photos and videos.
Parts:
- ESP32-WROVER x1
- GPIO Extension Board x1 (optional)
- Breadboard x1
- NeoPixel Ring 8 RGB LEDs
- Jumper M/M x9
- RGB LED
- Push buttons 1x
- Resistor 220Ω x5
RGB LED and NeoPixels schema:
RGB LED and NeoPixels Breadboard View:
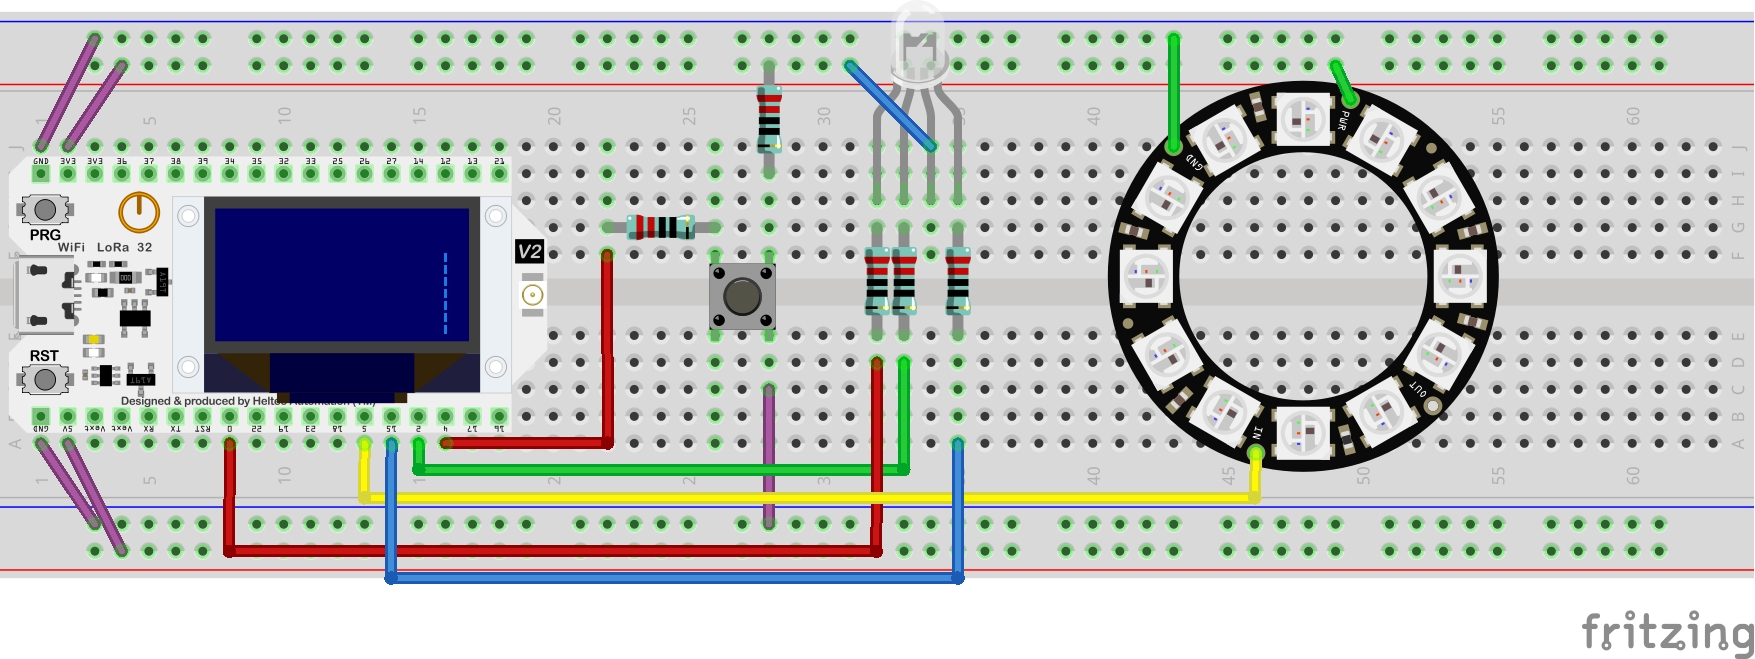
Note: Fritzing does not have NeoPixel Ring 8 RGB LEDs but it includes 12 LEDs ring. Please ignore this fact.
Source Code:
project-2.py
import neopixel
import time
from machine import Pin, PWM
from random import randint

pins = [15, 2, 0]

pwm0 = PWM(Pin(pins[0]), 10000)  # Red
pwm1 = PWM(Pin(pins[1]), 10000)  # Green
pwm2 = PWM(Pin(pins[2]), 10000)  # Blue

buttonChangeColor = Pin(4, Pin.IN, Pin.PULL_UP)


def setColorRGB(r, g, b):
    pwm0.duty(1023 - r)
    pwm1.duty(1023 - g)
    pwm2.duty(1023 - b)


pin = Pin(5, Pin.OUT)
np = neopixel.NeoPixel(pin, 8)

# colors from:
# https://docs.circuitpython.org/projects/led-animation/en/latest/api.html
# https://www.rapidtables.com/web/color/
brightness = 10
colors = [[255, 0, 0],  # red
          [255, 40, 0],  # orange
          [255, 150, 0],  # yellow
          [0, 255, 0],  # green
          [0, 0, 255],  # blue
          [75, 0, 130],  # indigo
          [238, 130, 218]]  # violet

colorIndex = 0
while True:
    while True:
        if not buttonChangeColor.value():
            time.sleep_ms(100)
            # giving time to the user
            colorIndex = (colorIndex + 1) % len(colors)
            # button iterate through the array
        for j in range(0, 8):
            np[j] = colors[colorIndex]
            # set color for the NEOPixel
            setColorRGB(colors[colorIndex][0]*4, colors[colorIndex]
                     [1]*4, colors[colorIndex][2]*4)
            # set color for the RGB
            np.write()
        time.sleep_ms(100)
Result:
Blog Link: https://www.boucek.dev/blog/physical-computing/lab-2-LEDs-and-push-buttons
Tutorials
To move forward I can show you what cool things you can make with the Freenove tutorials. They are well-guided and a lot of fun.
| Tutorial No. | Gif |
|---|---|
| 3.1 | 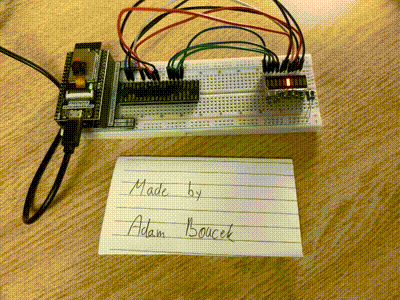 |
| 4.1 | 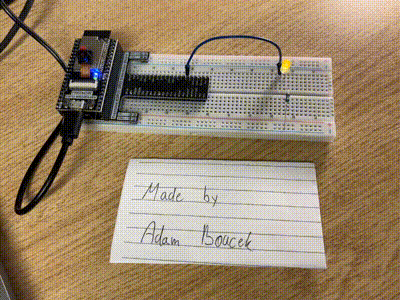 |
| 4.2 | 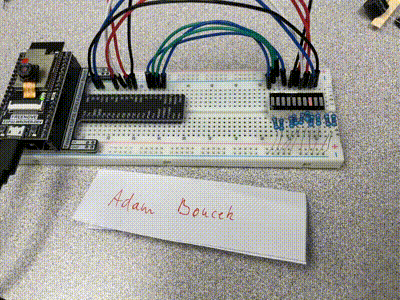 |
| 5.1 | 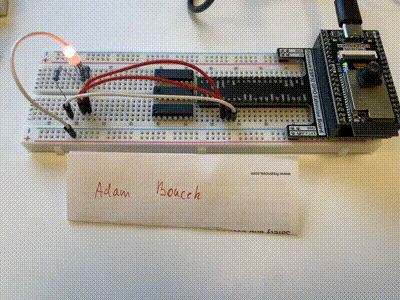 |
| 5.2 | |
| 6.1 | 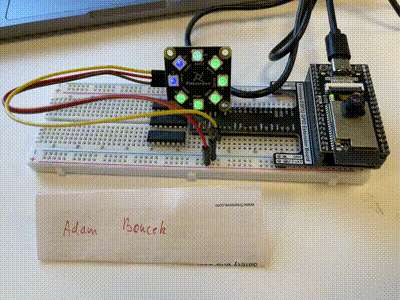 |
| 6.2 | 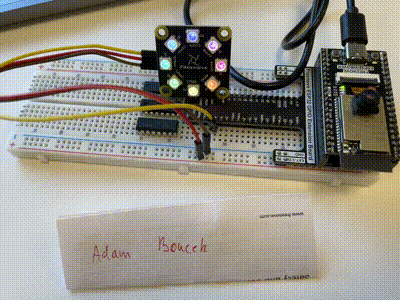 |